Hygger 24/7 Aquarium Light Instructions: A Comprehensive Guide
Many users find the Hygger 24/7 light programming confusing, despite online resources. This guide aims to clarify setup and operation for optimal planted tank health.
Understanding the Hygger 24/7 Light System
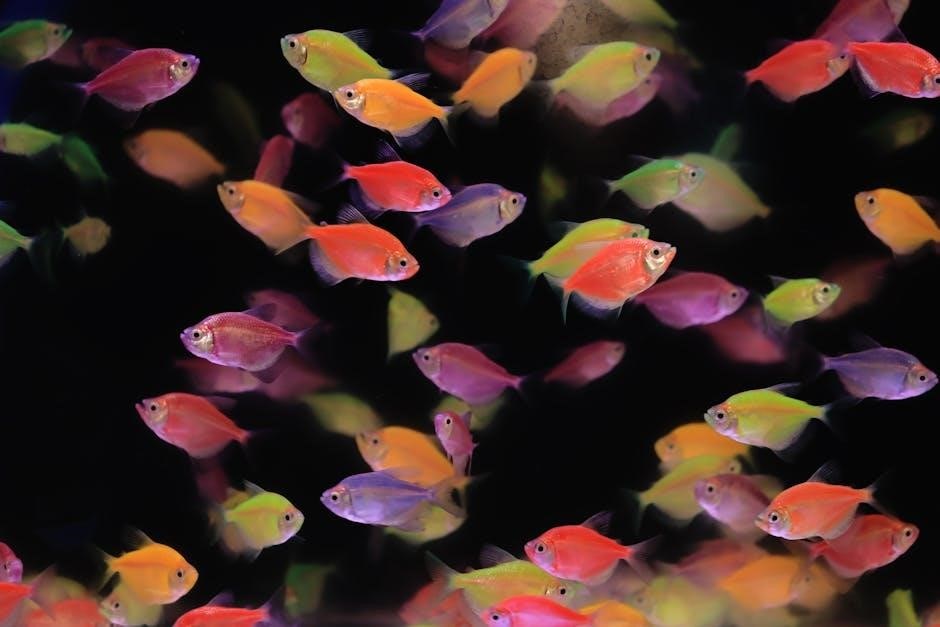
The Hygger 24/7 aquarium light is designed to mimic natural sunlight cycles, promoting healthy plant growth and vibrant aquarium life. Unlike traditional timers, this system offers full spectrum control and simulates sunrise, sunset, and even moonlight phases. Many new users struggle with initial programming, finding the default settings unintuitive and online tutorials insufficient.
This light isn’t simply about turning on and off; it’s about creating a dynamic lighting environment. The “24/7” mode allows for low-intensity lighting throughout the night, beneficial for certain plants and creating a more natural aesthetic. Understanding the interplay between the controller, remote, and light fixture is crucial for successful operation. Proper configuration unlocks the light’s full potential, avoiding common frustrations reported in freshwater aquarium forums.
Unboxing and Initial Setup
Upon receiving your Hygger 24/7 light, carefully inspect the box for any damage during shipping. Inside, you should find the light fixture itself, a separate controller/remote unit, and the necessary power adapter. Before proceeding, verify all components are present. Initial setup involves connecting the controller to the light fixture using the provided cable – ensure a secure connection.
Next, plug the power adapter into both the controller and a suitable power outlet. Avoid using extension cords if possible. Do not power on the light immediately. Familiarize yourself with the controller’s buttons and display. Many users report confusion at this stage, so take your time. A successful unboxing and initial connection are vital for smooth operation.
Component Identification
The Hygger 24/7 light system comprises three key components. First, the Light Fixture houses the LEDs and provides illumination for your aquarium. Its sleek design aims for minimal visual obstruction. Second, the Controller/Remote is your primary interface for programming and adjusting light settings, including intensity, timers, and spectrum. It features a display screen and several buttons for navigation.
Finally, the Power Adapter converts standard AC power to the DC voltage required by the light and controller. Ensure the adapter is securely connected to both the controller and a grounded electrical outlet. Understanding each component’s function is crucial for effective setup and troubleshooting, especially given reported initial programming difficulties.
Light Fixture
The Hygger 24/7 light fixture is designed with a low profile to maximize space above the aquarium; It incorporates full-spectrum LEDs, crucial for supporting healthy plant growth and displaying vibrant fish colors. The fixture’s construction utilizes aluminum for efficient heat dissipation, prolonging LED lifespan. Pay attention to the lens covering the LEDs; avoid abrasive cleaners that could scratch the surface and diffuse light output.
Inspect the fixture for any physical damage upon unboxing. The underside typically features mounting points for various bracket types. Ensure these are secure before installation to prevent accidental drops. The fixture itself contains no user-serviceable parts beyond external cleaning.
Controller/Remote
The Hygger 24/7 light utilizes a dedicated controller, often paired with a remote for convenient operation. This controller is the central hub for programming schedules, adjusting intensity, and enabling features like sunrise/sunset simulation. Many users report initial difficulty understanding the button layout and menu navigation, highlighting the need for a clear guide.
The remote allows wireless control, eliminating the need to physically access the controller. Ensure the remote has fresh batteries for optimal responsiveness. Familiarize yourself with the key functions – mode selection, dimming controls, and timer settings – before attempting complex programming. A lost remote necessitates using the controller directly.
Power Adapter
The Hygger 24/7 aquarium light requires a specific power adapter, typically a 12V DC adapter included in the package. Using an incorrect adapter can damage the light or prevent it from functioning correctly. Verify the voltage and amperage match the specifications printed on the light fixture and the adapter itself before connecting.
Ensure the adapter is plugged into a grounded electrical outlet. Avoid using extension cords or power strips if possible, as they can sometimes limit power delivery. Regularly inspect the adapter and cable for any signs of damage, such as fraying or exposed wires, and replace if necessary for safety.
Mounting Options
The Hygger 24/7 light offers versatile mounting solutions to accommodate various aquarium setups. Consider your tank type when selecting the best method. For rimless tanks, adjustable mounting brackets slide onto the glass, providing a secure and stable fit. These brackets typically feature rubber grips to protect the glass from scratches.
For tanks with traditional support rims, the light can be placed directly on the rim, utilizing the bracket’s adjustable width. Ensure a snug fit to prevent wobbling. Always prioritize a stable mounting solution to avoid accidental falls and potential damage to the light or aquarium.
Rimless Tank Mounting
Mounting the Hygger 24/7 light on a rimless aquarium requires utilizing the included adjustable brackets. Carefully slide the brackets onto the glass, ensuring they are positioned for optimal light distribution. The brackets feature rubberized grips to prevent scratching the glass surface during installation and use.
Adjust the bracket width to match your tank’s dimensions, creating a secure and stable platform for the light fixture. Regularly check the bracket’s grip to ensure it remains firmly attached. Prioritize safety and stability to prevent accidental dislodgement, protecting both the light and your aquarium inhabitants.
Tank with Support Brackets
For aquariums equipped with traditional support brackets, the Hygger 24/7 light can be securely mounted directly onto them. Ensure the brackets are robust enough to handle the light’s weight, preventing any potential instability or safety hazards. Carefully position the light fixture, centering it over the tank for even illumination.
Utilize the adjustable features of the light’s mounting system to achieve the desired height and angle. Regularly inspect the bracket connections to confirm they remain tight and secure. Prioritize a stable installation to safeguard against accidental falls and maintain optimal lighting conditions for your aquatic ecosystem.
Powering On and Basic Operation
To initiate operation, connect the provided power adapter to the Hygger 24/7 light’s controller and then plug it into a standard electrical outlet. The light should power on automatically, displaying the default settings. If it doesn’t, double-check all connections and ensure the outlet is functioning correctly.
The controller or remote allows for immediate adjustments to brightness and basic functions. Familiarize yourself with the button layout for power, manual mode, and dimming. Initial setup can be tricky, as some users report difficulty with default settings, so patience is key. Experiment with the controls to understand their responsiveness.
Default Settings and Initial Configuration
Upon first powering on, the Hygger 24/7 light typically defaults to a pre-programmed schedule simulating a natural day/night cycle. However, many users have encountered issues getting these defaults to function correctly, necessitating manual configuration. The initial brightness level is usually moderate, designed to support basic plant growth.
Before customizing, observe the default cycle for a full 24 hours to understand its behavior. Note the sunrise/sunset timings and overall intensity. If the light doesn’t activate as expected, consult the included manual or online resources, as the default settings can vary slightly between models.
Programming the Sunrise/Sunset Feature
The Hygger 24/7 light’s sunrise and sunset simulation is a key feature, mimicking natural light changes for reduced fish stress and enhanced plant growth. Programming involves setting the duration of both phases, typically adjustable in minutes. A gradual sunrise encourages natural waking, while a slow sunset promotes restful sleep for aquatic life.
Access these settings through the controller or remote. Experiment with durations – shorter for quicker transitions, longer for a more subtle effect. Observe your tank’s inhabitants to determine optimal settings. Remember, a realistic sunrise/sunset cycle significantly contributes to a healthy aquarium ecosystem.
Setting Sunrise Duration
To configure the sunrise duration on your Hygger 24/7 light, navigate to the sunrise setting within the controller’s menu. Typically, you’ll adjust this value in increments of minutes, ranging from a swift 10-minute ascent to a more gradual 60-minute progression. A shorter duration mimics a quick morning, while a longer one simulates a more natural, extended dawn.
Consider your plants’ light requirements and your fish’s sensitivity when choosing a duration. Observe how your aquarium responds to different settings. A gentle sunrise minimizes shock and encourages natural behaviors. Fine-tune the duration until you achieve a visually pleasing and biologically beneficial effect.
Setting Sunset Duration
Similar to sunrise, adjusting the sunset duration on your Hygger 24/7 light is done through the controller’s menu. Options generally range from 10 to 60 minutes, dictating how long the light gradually dims before reaching complete darkness. A shorter sunset mimics a cloudy evening, while a longer one simulates a clear, drawn-out dusk.
A gradual dimming period is crucial for fish and invertebrates, signaling the end of the day and preparing them for sleep. Avoid abrupt darkness, which can cause stress. Experiment with different durations to find what best suits your aquarium inhabitants and creates a natural-looking transition into nighttime.
Manual Mode Operation
Manual mode bypasses all programmed schedules, allowing for direct control over the Hygger 24/7 light’s intensity and spectrum. This is useful for temporary adjustments, like during feeding or aquarium maintenance, or for observing plant and fish reactions to different light settings. Access manual mode via the controller, typically by selecting a dedicated “Manual” option.
Within manual mode, you can adjust brightness levels from 0% to 100% and select preferred color channels. Remember to revert to a programmed schedule afterward to maintain consistent lighting for your aquatic ecosystem. Manual overrides don’t save, ensuring scheduled programs resume as intended.
Full Spectrum Control & Dimming
The Hygger 24/7 light boasts full spectrum control, enabling customization of light wavelengths to suit various plant needs and enhance fish coloration. Adjusting the spectrum involves manipulating red, green, and blue (RGB) channels via the controller or remote. Dimming functionality allows precise intensity control, crucial for preventing algae blooms and accommodating sensitive species.
Experiment with different spectrum combinations to optimize plant growth and create visually appealing aquascapes. Gradual dimming, especially during sunrise and sunset simulations, minimizes stress on aquatic life. Remember that excessive intensity can harm both plants and animals, so careful adjustment is key.
Timer Functionality – 24/7 Mode Explained
The Hygger 24/7 light’s timer allows for automated on/off cycles, simulating natural daylight. “24/7 Mode” isn’t a single setting, but rather utilizing the timer to create a low-intensity, extended photoperiod. This mimics dawn and dusk, promoting plant growth and natural fish behaviors.
Setting specific on/off times is straightforward via the controller. Adjusting intensity throughout the day is crucial; lower levels during “night” prevent algae and allow for restful periods. Experiment to find the ideal balance for your tank’s inhabitants. Remember, consistent timing is vital for a stable aquatic environment.
Setting Specific On/Off Times
To set precise on/off times with your Hygger 24/7 light, access the timer function on the controller. Typically, you’ll navigate to a “Timer” or “Schedule” menu. Here, you can program multiple on/off cycles throughout the day. Begin by setting the desired start time for your primary lighting period – usually simulating daylight hours.
Then, define the duration of this period. Next, program the “off” time, creating a nighttime phase. Many controllers allow for multiple schedules, enabling varied intensity levels at different times. Ensure accurate timekeeping on the controller for reliable operation. Save your settings and verify the schedule.
Adjusting Intensity Throughout the Day
The Hygger 24/7 light excels at simulating natural daylight cycles. Within the timer settings, look for intensity control options, often expressed as a percentage. Gradually increase intensity during the “sunrise” period, mimicking the sun’s ascent. Maintain peak intensity during the midday hours, supporting robust plant growth.
Then, slowly dim the light during the “sunset” phase, preparing the aquarium for nighttime. Experiment with different intensity levels to find what best suits your plants and fish. Lower intensities during off-peak hours reduce algae growth and provide a restful environment. Save your customized intensity schedule for consistent results.
Troubleshooting Common Issues
Many new Hygger 24/7 light owners encounter initial setup hurdles. If the light fails to power on, double-check the power adapter connection at both the light and outlet. A non-responsive remote often indicates low batteries – replace them and try re-pairing. For incorrect time displays, access the timer settings and manually adjust the time.
If problems persist, ensure the controller is receiving a clear signal from the remote. Avoid obstructions. Online forums suggest some users struggle with initial programming; carefully review the manual and consider searching for user-created video tutorials for clarification.
Light Not Turning On
If your Hygger 24/7 light isn’t illuminating, begin with the simplest checks. First, verify the power adapter is securely plugged into both the light fixture and a functioning electrical outlet. Test the outlet with another device to confirm it’s providing power. Inspect the power adapter cable for any visible damage, such as cuts or fraying.
Next, ensure the controller is properly connected to the light fixture. A loose connection can prevent power delivery. If using a power strip, confirm it’s switched on and functioning correctly. Finally, consult the manual for any specific reset procedures recommended by Hygger.
Remote Not Responding
A non-responsive remote with your Hygger 24/7 light is a common frustration. Begin by checking the batteries within the remote control, replacing them with fresh ones if necessary. Ensure there’s a clear line of sight between the remote and the light’s receiver; obstructions can interfere with the signal.
Try resetting the remote by briefly removing and reinserting the batteries. If the issue persists, attempt to re-pair the remote with the light fixture, consulting the user manual for specific pairing instructions. Interference from other electronic devices could also be a factor; move them away from the aquarium setup.
Incorrect Time Display
An inaccurate time display on your Hygger 24/7 light can disrupt programmed schedules. First, verify that the light is receiving power consistently; interruptions can cause time resets. Access the time setting menu using the controller, carefully following the instructions in the user manual to adjust the hours and minutes.
Ensure you’ve selected the correct time format (12-hour or 24-hour). If the time continues to drift or reset, consider a potential issue with the internal clock. Contact Hygger support for assistance, as it might indicate a hardware malfunction requiring further troubleshooting or a possible replacement.
Maintaining Your Hygger Light
Regular maintenance ensures the longevity and optimal performance of your Hygger 24/7 aquarium light. Periodically, disconnect the light from power before cleaning the fixture with a soft, damp cloth to remove dust and splashes. Avoid abrasive cleaners or submerging the light in water, as this can damage the LEDs and electrical components.
Inspect the power adapter and cables for any signs of wear or damage. While LED modules aren’t typically user-replaceable on most Hygger models, check the manual for specific guidance. Proper care will maximize the lifespan and maintain the vibrant spectrum crucial for healthy plant growth.
Cleaning the Light Fixture
To effectively clean your Hygger light fixture, always begin by disconnecting it from the power source to prevent electrical shock. Use a soft, damp cloth – microfiber is ideal – to gently wipe away any dust, water spots, or debris that may have accumulated on the surface. Avoid harsh chemicals, abrasive cleaners, or solvents, as these can damage the fixture’s finish and potentially harm the sensitive LED components.
Ensure the cloth is only slightly damp; never spray water directly onto the light. Pay particular attention to areas near the vents, ensuring they remain unobstructed for proper heat dissipation. Regular cleaning maintains optimal light output.
Replacing the LED Modules (If Applicable)
While Hygger 24/7 lights are designed for longevity, LED modules may eventually require replacement. First, and crucially, disconnect the light from power. Consult your model’s specific documentation, as procedures vary. Typically, this involves removing a protective cover, often secured with screws, to access the LED strips.
Carefully disconnect the old module and connect the new one, ensuring correct polarity. Secure the cover again. If unsure about any step, contact Hygger support. Improper installation can damage the fixture or void the warranty. Replacement modules are available through Hygger’s website or authorized retailers.
Safety Precautions
Always disconnect the Hygger 24/7 light from the power outlet before performing any maintenance, including cleaning or module replacement. Never operate the light if the power cord or fixture is damaged. Avoid exposing the light to excessive moisture or direct water contact, as this poses an electrical hazard.
Ensure the light is securely mounted to prevent accidental falls. Do not attempt to disassemble or repair the light beyond the scope of the instructions. Use only the provided power adapter; using an incompatible adapter could damage the light or create a safety risk. Keep the light out of reach of children.
Frequently Asked Questions (FAQ)
Q: My light isn’t responding to the remote? Ensure fresh batteries are installed correctly. Try re-pairing the remote following the manual’s instructions. Q: The time display is incorrect? Access the time setting menu via the controller and adjust accordingly. Q: Can I use this light with saltwater tanks? This light is designed for freshwater planted tanks; saltwater use isn’t recommended.
Q: Where can I find more detailed programming tutorials? Check the Hygger official website or search for user-created videos online. Q: What if I’m still struggling with the settings? Contact Hygger’s customer support for personalized assistance.