
ProStart Remote Starter Installation Guide: A Comprehensive Plan
This guide details the installation of ProStart remote start systems, covering both automatic and manual transmissions. It’s designed for certified technicians
with existing electrical engineering expertise, ensuring a safe and effective installation process.

The current date is 03/30/2026 16:36:06 (). Access to installation manuals for CT-3371, CT-5072, and CT-3271 models is available online.
ProStart remote starters offer convenience and comfort, allowing vehicle pre-heating or pre-cooling from a distance. These systems enhance the driving experience, particularly in extreme weather conditions. This comprehensive installation guide caters to both automatic and manual transmission vehicles, providing detailed instructions for a successful setup.
Designed for professional installers, this guide assumes a foundational understanding of automotive electrical systems. Proper installation is crucial for safety and optimal performance. The ProStart range includes various models, such as the CT-3371, CT-5072, and CT-3271, each with specific installation nuances.
This document serves as a quick reference, complementing the full PDF manuals available online. Technicians should consult the complete manual for in-depth information and troubleshooting. Remember, a certified technician must perform the installation, utilizing all supplied safety devices.
Safety Precautions & Disclaimers
Prior to installation, disconnect the vehicle’s battery to prevent accidental shorts and electrical damage. Exercise extreme caution when working with automotive wiring, as improper connections can lead to system malfunction or vehicle damage. Always utilize appropriate safety equipment, including insulated tools and eye protection.
This guide is intended as a reference for trained professionals. It is crucial to adhere to all local and national electrical codes. Failure to follow these precautions could result in personal injury or property damage. Ensure the vehicle’s parking brake is fully functional before integrating the system.
Tools and Materials Required
Essential tools include a digital multimeter for accurate voltage readings, wire strippers and crimpers for secure connections, and a soldering iron with rosin-core solder for permanent joints. A circuit tester is vital for identifying vehicle wiring. Required materials encompass various gauge automotive-grade wiring, ranging from 16 to 22 AWG, depending on the circuit.
Connectors and hardware should include butt connectors, T-taps (use sparingly), and ring terminals. Zip ties are necessary for neat wire management. A properly sized fuse and fuse holder are critical for circuit protection. Consider having dielectric grease on hand to protect connections from corrosion. Ensure all components are compatible with the vehicle’s electrical system.
Specific ProStart modules and the corresponding programming tool are, of course, essential for a successful installation.
Essential Wiring Tools
A high-quality digital multimeter (DMM) is paramount for verifying voltage, continuity, and resistance within the vehicle’s electrical system. Wire strippers, capable of handling 16-22 AWG automotive wire, are crucial for preparing wires for connection. Crimping tools – specifically, a ratcheting crimper – ensure secure and reliable terminations with butt connectors and terminals.

A circuit tester, often a “test light,” quickly identifies powered wires without needing a DMM. Soldering iron and solder (rosin-core) provide permanent, corrosion-resistant connections, though crimping is often sufficient. Flush cutters are ideal for cleanly trimming wire ends. Heat shrink tubing and a heat gun protect connections and improve aesthetics.
Don’t forget a wire fishing tool to navigate wires through tight spaces within the vehicle.
Required Connectors and Hardware
Essential connectors include a variety of butt connectors (insulated and non-insulated) for joining wires, along with Posi-Products connectors for tap-ins without cutting factory wiring. Ring terminals are necessary for grounding connections to the vehicle’s chassis. Fuse taps (add-a-fuse) allow for safely sourcing ignition or accessory power.

Hardware requirements consist of zip ties for secure wire management, preventing chafing and movement. Electrical tape provides additional insulation and protection. Double-sided tape is useful for mounting the ProStart module securely. Inline fuse holders with appropriately sized fuses are critical for protecting the system and vehicle.
Consider using dielectric grease on connections to prevent corrosion, ensuring long-term reliability.

Vehicle Compatibility Check
Prior to installation, a thorough vehicle compatibility check is paramount. Utilize ProStart’s online database or dedicated software to confirm the specific vehicle year, make, and model are supported. Verify the transmission type (automatic or manual) matches the selected ProStart system.
Crucially, confirm compatibility with existing security systems, including factory alarms. Interference or conflicts can occur if not addressed. Check for any vehicle-specific notes or bypass module requirements listed in the compatibility data.
Ensure the vehicle’s electrical system meets the ProStart system’s voltage requirements. Incorrect voltage can damage the unit. Always double-check compatibility before proceeding with the installation.
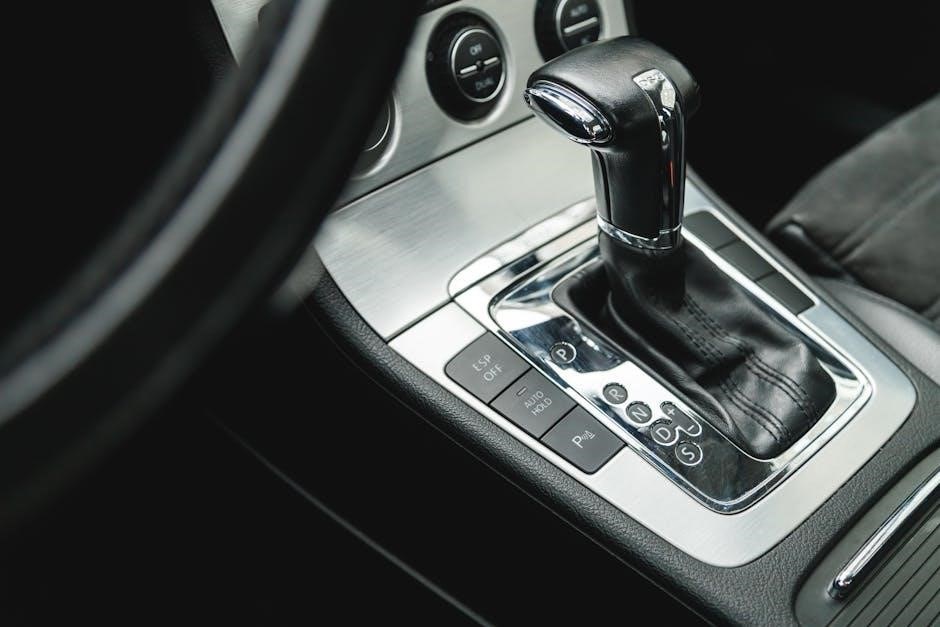
System Overview: 2-Button System Features
The ProStart 2-button remote start system offers convenient vehicle control. Button one initiates the remote start sequence, allowing the engine to run for a pre-programmed duration. Button two typically provides a secondary function, such as locking or unlocking the doors, or activating a panic feature.
This system supports various features like parking brake engagement verification for safety. OEM alarm integration is possible, disarming the factory alarm during remote start. The system is designed for both automatic and manual transmission vehicles, requiring specific wiring configurations for each.
Programming options allow customization of run-time duration and other settings. Proper installation and programming are crucial for optimal performance and safety.
Wiring Diagram Interpretation
ProStart wiring diagrams are essential for correct installation. They illustrate the connections between the ProStart module and the vehicle’s electrical system, using standardized symbols for wires, connectors, and components. Understanding color codes is vital; each wire color represents a specific function, like ignition, starter, or accessory power.
Diagrams differentiate between automatic and manual transmission wiring, as safety switch integration varies. Pay close attention to ground connections, ensuring a solid chassis ground for reliable operation. Locate key wires such as the parking brake, hood pin, and tachometer signal for proper system functionality.
Carefully trace each wire’s path to avoid errors and potential damage to the vehicle’s electrical system.
Installation Process: Automatic Transmission Vehicles
For automatic transmission vehicles, the installation begins with locating key wiring points as indicated in the vehicle-specific diagram. Connect the ProStart module, ensuring secure connections to the ignition, starter, accessory, and ground wires. The safety switch is typically integrated through the brake switch, preventing remote start if the brake pedal isn’t pressed.
Carefully route all wiring harnesses, avoiding hot engine components and moving parts. Secure the module in a safe, dry location, away from potential damage. Double-check all connections before proceeding to testing, verifying proper polarity and secure crimps.
Proper installation ensures reliable remote starting and prevents electrical issues.

Identifying Key Wiring Locations (Automatic)
Locating the correct wiring is crucial for a successful automatic transmission installation. Begin by identifying the ignition wire, typically found within the steering column harness. The starter wire is usually a thicker gauge wire connected directly to the starter solenoid. Accessory wires power the radio and other accessories, often bundled together.
Ground connections are essential; utilize a clean, unpainted metal surface. Consult the vehicle-specific wiring diagram for precise wire colors and locations. Use a multimeter to verify wire functionality before making any connections. Carefully remove any necessary trim panels to gain access.

Accuracy in wire identification prevents damage and ensures proper system operation.
Connecting the ProStart Module (Automatic)
Once wiring locations are confirmed, connect the ProStart module securely. Begin with the ground wire, ensuring a solid connection to a clean metal surface. Connect the ignition wire to the designated ProStart input, verifying polarity. The starter wire connects to the appropriate output, enabling remote start functionality.
Utilize the provided connectors for secure and reliable connections. Carefully route wires away from moving parts and heat sources. Double-check all connections before proceeding. Refer to the wiring diagram for specific wire assignments.
Proper module connection is vital for system performance and longevity.
Installation Process: Manual Transmission Vehicles
Installing a ProStart system in a manual transmission vehicle requires careful attention to safety switch integration. Unlike automatic transmissions, a manual vehicle necessitates a confirmed neutral position before remote starting. The safety switch, crucial for preventing unintended vehicle movement, must be correctly connected.
This involves wiring the ProStart module to the vehicle’s clutch switch or a dedicated neutral safety switch. Proper configuration ensures the system only activates when the clutch is depressed or the transmission is in neutral. Refer to the vehicle-specific wiring diagram for accurate connections.
A certified technician should perform this installation due to the complexity and safety implications.
Identifying Key Wiring Locations (Manual)
For manual transmission vehicles, pinpointing the correct wiring locations is paramount. Focus on the clutch switch, typically found near the clutch pedal assembly – this signals clutch engagement. Locate the neutral safety switch, if equipped, often near the gear shifter. Identify the ignition wires – these control power to the ignition system.
The parking light wire is essential for confirming the system is active. Access to these wires often requires removing panels under the dashboard. Use a wiring diagram specific to the vehicle’s year, make, and model for accurate identification. A multimeter is invaluable for verifying wire functionality.
Carefully label each wire before disconnecting to avoid confusion during reassembly;
Connecting the ProStart Module (Manual) ‒ Safety Switch Integration
Integrating the safety switch is crucial for manual transmission vehicles. Connect the ProStart module’s designated wire to the clutch switch output. This ensures the remote start only functions when the clutch is fully depressed and the vehicle is in neutral. Proper connection prevents unintended engine starts.
Verify the wiring diagram for the specific ProStart model and vehicle. Use appropriate connectors and ensure a secure, insulated connection. Test the safety switch functionality with a multimeter before proceeding. Incorrect wiring can disable the remote start or create a safety hazard.
Double-check all connections before restoring power to the system.
Parking Brake Shutdown System Integration
Integrating the parking brake shutdown is a vital safety feature. The ProStart system requires confirmation that the parking brake is engaged before remote starting. Connect the ProStart module’s designated wire to the parking brake switch output, or the signal wire indicating brake status.
Ensure a secure connection and proper insulation. Test the system thoroughly to verify the remote start only activates with the parking brake firmly applied. Failure to integrate this feature correctly can lead to dangerous situations. Consult the vehicle’s wiring diagram for accurate identification of the parking brake signal.
Proper integration is paramount for safe operation.
OEM Alarm Control Integration
Integrating with the vehicle’s original equipment manufacturer (OEM) alarm system is crucial for maintaining security features. The ProStart system can often be configured to disarm the OEM alarm during remote start, preventing false alarms. Identify the alarm disarm wire using the vehicle’s wiring diagram – this typically requires a momentary pulse signal.
Connect the ProStart module’s designated alarm disarm output to this wire. Carefully test the integration to confirm the alarm disarms and re-arms correctly with remote start operation. Improper connection can disable the alarm or cause unexpected behavior. Refer to the ProStart manual for specific wiring configurations for various vehicle makes and models.
Successful integration ensures seamless operation.
Door Lock/Unlock Function Integration
Integrating door lock and unlock functionality enhances the convenience of the ProStart system. Typically, this involves connecting to the vehicle’s central locking system. Identify the appropriate wires – usually a pulse signal for lock and another for unlock – using the vehicle’s wiring diagram.
Connect the ProStart module’s corresponding output wires to these signals. Configuration options may allow for automatic locking upon remote start or unlocking when the vehicle is turned off. Thoroughly test both lock and unlock functions with the remote starter activated and deactivated.
Ensure proper operation to avoid issues with vehicle security. Refer to the ProStart manual for vehicle-specific wiring details and programming instructions.
Testing the Remote Start System
Post-installation testing is crucial to verify the ProStart system functions correctly and safely. Begin with a basic remote start test, ensuring the engine starts smoothly from a distance. Confirm the system adheres to all safety parameters, including the parking brake and neutral safety switch requirements.
Thoroughly test the parking brake shutdown feature; the engine should not start if the brake isn’t engaged. Verify OEM alarm control integration – the alarm should disarm upon remote start. Finally, test the door lock/unlock functions alongside the remote start sequence.
Document all test results and address any discrepancies before finalizing the installation;
Basic Remote Start Functionality Test
Initiate the test in a safe, open area with the vehicle in park (automatic) or neutral (manual) and the parking brake firmly engaged. Press the designated remote start button – typically the first button on a 2-button system. Observe if the engine cranks and starts smoothly without any unusual noises or hesitations.
Verify the engine runs consistently for a reasonable duration before attempting to shut it off via the remote. Check for any error indicators on the ProStart system or the vehicle’s dashboard. Repeat the process several times to ensure consistent performance.
Document the results, noting any issues encountered during this initial functionality check.

Testing Parking Brake & Safety Features
Confirm the parking brake must be engaged for remote start to function. Attempt to start the vehicle remotely without the parking brake applied; the system should not initiate the engine. This verifies the crucial safety interlock is operational.
Test the hood pin switch (if installed) by opening the hood during a remote start attempt. The engine should immediately shut down, confirming the safety feature prevents operation with the hood open.
Verify the brake pedal switch functions correctly by attempting a remote start while pressing the brake pedal. The system should not start, ensuring operation only when the vehicle is safely secured.
Document all test results meticulously.
Programming the ProStart System
Programming the ProStart system is crucial for optimal functionality and vehicle-specific operation. Refer to the detailed programming sequence outlined in the ProStart system’s manual – specific procedures vary by model (CT-3371, CT-5072, CT-3271).
Typically, programming involves a series of key turns and remote button presses to teach the system the vehicle’s unique characteristics. This includes setting the run-time duration, recognizing the correct transmission type, and configuring any optional features.
Carefully follow each step to avoid errors. Incorrect programming can lead to malfunctions or unexpected behavior. Always double-check the settings after completion. A successful programming sequence is confirmed by the system’s indicator light.
Troubleshooting Common Installation Issues
Common issues post-installation often involve the system not recognizing the vehicle, failing to start, or exhibiting erratic behavior. Verify all wiring connections are secure and correctly matched to the vehicle’s wiring harness – a loose connection is a frequent culprit.
If the system doesn’t respond, check the ProStart module’s power and ground connections. A blown fuse can also prevent operation. Programming errors can cause no-start conditions; re-attempt the programming sequence carefully.
For alarm integration problems, ensure the OEM alarm disarm signal is correctly connected. Consult the ProStart manual for model-specific troubleshooting steps and diagnostic codes. Remember, proper installation by a certified technician minimizes these issues.
ProStart CT-3371 Specific Installation Notes
The ProStart CT-3371 model requires careful attention to the hood pin switch integration, crucial for safety. Ensure proper adjustment to prevent unintended starts when the hood is open. Verify compatibility with the vehicle’s CAN-bus system, as some models may necessitate a bypass module.
Pay close attention to the parking light flash confirmation during programming; this confirms successful communication with the vehicle. The CT-3371 is known for its reliable performance, but correct wiring is paramount. Refer to the detailed wiring diagrams specific to the CT-3371 for accurate connections.
Access to the installation guide is available through the Internet Archive, offering a valuable resource for technicians.
ProStart CT-5072 Specific Installation Notes
The ProStart CT-5072 model often requires a slightly different approach to OEM alarm disarming. Technicians should carefully test the alarm integration after installation to avoid false triggers. This model benefits from a robust digital CAN-bus interface, simplifying integration with modern vehicles.

When programming the CT-5072, pay close attention to the runtime limits; exceeding these limits can void the warranty. Ensure the vehicle’s immobilizer is correctly bypassed or integrated with the system. The Internet Archive provides access to the full installation guide for reference.
Proper grounding is essential for the CT-5072’s reliable operation; verify a solid connection to the vehicle’s chassis.
ProStart CT-3271 Specific Installation Notes
The CT-3271 model frequently encounters compatibility issues with certain vehicle immobilizer systems. Technicians must verify the specific bypass module required for the target vehicle before commencing installation. Careful attention should be paid to the parking light flash pattern during programming, as incorrect settings can lead to operational errors.
This unit’s sensitivity to voltage fluctuations necessitates a stable power source and, potentially, a relay to isolate the remote start module. The Internet Archive offers a downloadable version of the CT-3271 installation guide for detailed schematics and troubleshooting tips.
Always double-check all wiring connections before powering on the system to prevent short circuits.
Warranty Information & Support
ProStart remote start systems are covered by a limited lifetime warranty against defects in materials and workmanship, provided the system is professionally installed by a certified technician. Warranty coverage is voided by improper installation, misuse, or unauthorized modifications.
For technical support and warranty claims, please visit the official ProStart website or contact our customer service department. Detailed installation guides, including those for the CT-3271, CT-3371, and CT-5072 models, are available for download via the Internet Archive.
Remember to retain your proof of purchase for warranty validation. We are committed to providing excellent support to ensure a seamless installation experience.
Important Notices & Legal Disclaimers
Please read carefully: Installation of a remote starter system may affect your vehicle’s factory warranty. ProStart assumes no responsibility for any consequential damages resulting from installation or use. This guide is intended for qualified technicians only, assuming a certain level of skill and knowledge.
Always adhere to all local and national laws regarding vehicle modifications. Improper installation can lead to vehicle malfunction or safety hazards. Refer to the complete installation manuals (CT-3271, CT-3371, CT-5072 available online) for detailed instructions.
The Internet Archive provides access to historical installation documentation. ProStart reserves the right to update these guides without prior notice.