
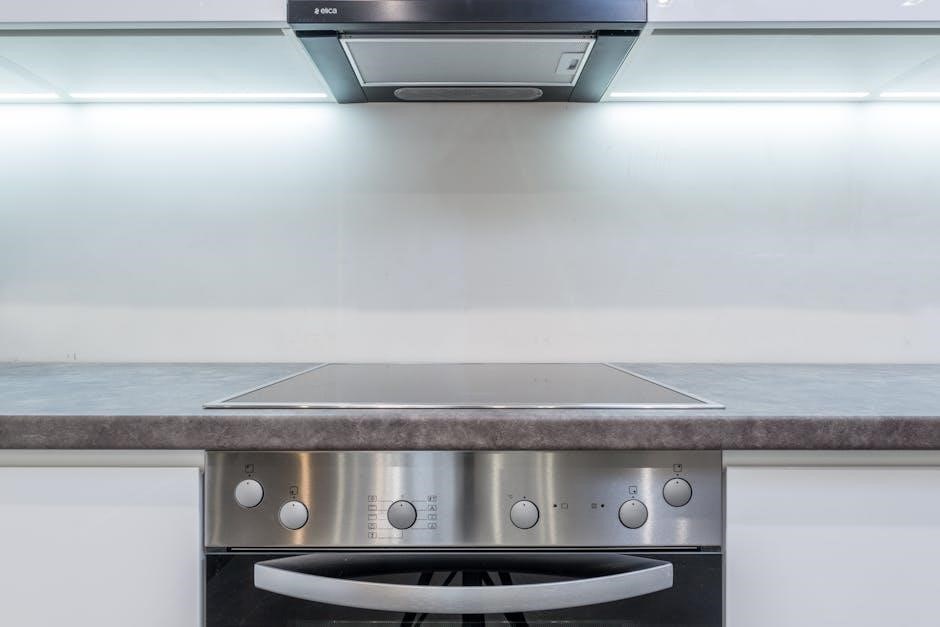
Understanding Your GE Oven’s Self-Cleaning Feature
Modern GE ovens boast a self-cleaning function, utilizing high temperatures to incinerate food residue, simplifying maintenance and offering convenience to homeowners.
What is a Self-Cleaning Oven?
Self-cleaning ovens represent a significant advancement in kitchen appliance technology, designed to alleviate the often arduous task of manual oven cleaning. These ovens employ a high-heat cycle – reaching temperatures around 880°F (470°C) – to pyrolyze food spills, grease, and baked-on residue. This process effectively reduces these substances to ash, which can then be easily wiped away once the oven has cooled completely.
Unlike traditional cleaning methods involving harsh chemicals and scrubbing, a self-cleaning oven utilizes intense heat, offering a more convenient and often more effective cleaning solution. Many GE models incorporate this feature, providing homeowners with a simpler way to maintain a clean and hygienic cooking environment. It’s a potentially dangerous feature, requiring strict adherence to safety precautions.
How Does the Self-Clean Cycle Work?
The self-clean cycle in a GE oven operates by locking the oven door and raising the internal temperature to an extremely high level – typically around 880°F (470°C). At this temperature, food residue undergoes pyrolysis, a process where organic matter decomposes and transforms into ash, carbon dioxide, and water vapor.
This intense heat effectively burns away accumulated grease, spills, and baked-on food particles. The cycle duration varies depending on the selected setting and the level of soiling, ranging from two to four hours. Once completed, and after the oven cools, a light ash residue remains, easily wiped away with a damp cloth. Smoke emission during the initial use is normal.
Preparing Your GE Oven for the Self-Clean Cycle
Proper preparation is crucial; remove oven racks, pans, and foil, ensure adequate kitchen ventilation, and verify the door latch functions correctly before starting.
Removing Oven Racks and Accessories
Before initiating the self-clean cycle on your GE oven, meticulous preparation is essential, beginning with the complete removal of all oven racks, broiler pans, baking stones, and any aluminum foil. These items cannot withstand the extremely high temperatures generated during the self-clean process and may become damaged, discolored, or even pose a fire hazard.
Carefully slide the racks forward and lift them out of the oven cavity. Ensure you have a clear space to place them, preventing accidental scratches or damage to your kitchen surfaces. Remove any baking accessories or cookware left inside. A thorough removal of all items guarantees a safe and effective self-cleaning experience, protecting both your oven and your belongings.
Checking Kitchen Ventilation
Adequate kitchen ventilation is paramount before starting the self-clean cycle on your GE oven. This process generates significant heat and fumes, potentially causing discomfort and air quality concerns. Open windows in the immediate vicinity of the kitchen to create cross-ventilation, allowing fresh air to circulate;
Alternatively, or in addition to opening windows, activate your kitchen exhaust fan or range hood to effectively remove airborne particles and odors. Proper ventilation minimizes the buildup of smoke and smells, ensuring a more comfortable and safer cleaning experience. Consider the proximity of smoke detectors and ensure they won’t be falsely triggered by the fumes.
Ensuring Door Latch Functionality
A securely latched oven door is absolutely critical before initiating the self-clean cycle on your GE oven. The self-clean process reaches extremely high temperatures, and an open or improperly latched door poses a significant safety hazard. Verify the door latch engages firmly and completely, preventing accidental opening during operation.
If the door doesn’t latch correctly, do not attempt to run the self-clean cycle. A malfunctioning latch could interrupt the heating process or allow dangerous fumes to escape. Consult your GE oven’s user manual for specific latch inspection and troubleshooting instructions. A faulty latch may require professional repair before using the self-clean feature.
Initiating the Self-Clean Cycle
To begin, remove all items, select the desired cycle length via the control panel, and ensure the door is securely latched for operation.
Selecting the Appropriate Cycle Length
GE ovens typically offer varying self-clean cycle durations, catering to different levels of oven soiling. A light cycle, around two to three hours, suits lightly soiled ovens, minimizing energy consumption and cleaning time. For moderate buildup, a standard cycle of three to four hours provides a more thorough clean.
Heavily soiled ovens benefit from the heavy-duty cycle, extending to four to five hours, ensuring complete residue removal. Consider the oven’s condition; frequent light cleans are preferable to infrequent, lengthy heavy-duty cycles. Always refer to your GE oven’s manual for specific cycle recommendations and estimated run times, as models may vary. Selecting the correct length optimizes cleaning efficiency and oven longevity.
Understanding Control Panel Options
GE oven control panels offer intuitive options for managing the self-clean cycle. Typically, a “Self Clean” button initiates the process, often followed by choices for cycle length – light, standard, or heavy – as previously discussed. A “Control Lock” feature disables the panel during the cycle, preventing accidental interruption.
Some models include a “Delay Start” option, allowing you to schedule cleaning for a convenient time. Pay attention to indicator lights; a “Self Clean” light illuminates during operation, and a “Cool Down” indicator signals completion. Refer to your GE oven’s manual for a detailed explanation of your specific model’s control panel functions and safety features.

Troubleshooting Common Self-Clean Issues
Common issues include failure to heat, start, or excessive smoke emission; ensure proper door latching, temperature settings, and ventilation for optimal performance.
Oven Not Heating During Self-Clean
If your GE oven fails to heat during the self-clean cycle, several factors could be at play. First, verify the door is completely latched; a slightly ajar door will prevent the cycle from initiating due to a safety interlock.
Next, check the oven’s temperature settings and ensure they haven’t been inadvertently altered. A malfunctioning oven temperature sensor could also be the culprit, requiring professional diagnosis and potential replacement. Furthermore, a tripped circuit breaker or a blown fuse dedicated to the oven can interrupt power supply.
Inspect the control panel for error codes, as these often provide specific insights into the problem. Finally, if the oven is new, initial use may produce smoke, but consistent failure to heat necessitates further investigation.
Self-Clean Cycle Fails to Start
When a GE oven’s self-clean cycle refuses to begin, the issue often stems from a few common causes. Activate the control lock, as this feature can inadvertently prevent cycle initiation. Confirm the door latch is securely engaged; the oven won’t start without a proper seal for safety reasons.
Check for any error codes displayed on the control panel, as these provide valuable diagnostic clues. A faulty door latch switch might be signaling the oven that the door isn’t fully closed, even when it is.
Ensure the oven hasn’t recently experienced a power interruption, as a reset might be needed. Finally, a malfunctioning control board could be the underlying problem, requiring professional repair or replacement.
Smoke Emission During Self-Clean
Some smoke during the self-clean cycle is normal, particularly during the initial uses of the feature or if significant food buildup exists within the oven. This smoke results from the burning of residual food particles at extremely high temperatures. However, excessive or dark smoke warrants attention.
Ensure proper kitchen ventilation by opening windows or utilizing the exhaust fan to dissipate the fumes; Avoid any cleaning products before initiating the cycle, as they can contribute to smoke and unpleasant odors;
If smoke persists after several cycles, or if it’s accompanied by a burning smell beyond the typical odor, it could indicate a potential issue with the oven’s components, requiring professional inspection.
Post-Self-Clean Procedures
After the cycle completes, allow the oven to cool completely before opening. Then, wipe away any ash residue with a damp cloth for a pristine finish.
Allowing the Oven to Cool Completely
Resist the urge to immediately open the oven door following the self-clean cycle’s completion. The internal temperatures reach incredibly high levels – potentially exceeding 900°F (482°C) – and a rapid temperature change could damage the oven’s components, particularly the door seal or glass.
Allow ample time for cooling; this can take several hours, depending on the cycle length and your oven model. A completely cooled oven minimizes the risk of burns and ensures safe ash removal. Do not attempt to wipe down the interior until the oven has cooled sufficiently to the touch. Patience is key to preventing damage and ensuring your safety after utilizing the self-clean feature.
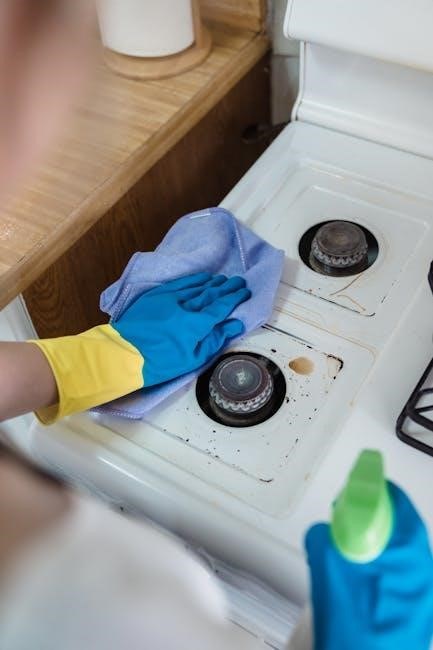
Wiping Away Ash Residue
Once the oven is completely cool, a fine layer of ash will remain on the interior surfaces. This is a normal byproduct of the self-clean cycle. Use a damp cloth or sponge to gently wipe away the ash residue. Avoid abrasive cleaners or scouring pads, as these can scratch the oven’s enamel coating.
For stubborn ash deposits, a paste of baking soda and water can be effective. Ensure all residue is removed before using the oven again. A final wipe-down with a clean, damp cloth will leave the interior sparkling. Remember to dispose of the ash properly – it’s generally safe to discard with household waste.
Safety Precautions During Self-Cleaning
Avoid oven use during the cycle and keep children and pets away due to extremely high temperatures generated by the self-cleaning process.
Avoiding Oven Use During Cycle
Crucially, refrain from using the oven at all while the self-clean cycle is in progress. The temperatures reached – often exceeding 880°F (470°C) – are incredibly high and pose a significant burn risk. Attempting to open the oven door during this process is also strongly discouraged, as the intense heat can cause severe injuries.
The self-clean cycle is designed to operate independently, and any interruption could compromise its effectiveness or even damage the oven’s components. Furthermore, any items left inside the oven during the cycle will be subjected to these extreme temperatures, potentially causing them to melt, ignite, or release harmful fumes. Prioritize safety by ensuring the oven remains undisturbed throughout the entire self-cleaning duration.
Keeping Children and Pets Away
Maintaining a safe environment is paramount during the self-clean cycle. Children and pets should be kept a considerable distance away from the oven throughout the entire process. The exterior surfaces of the oven become extremely hot, presenting a severe burn hazard upon contact.
Supervise children closely and ensure they understand the dangers associated with a hot oven; Pets, particularly those with curious natures, should be confined to another area of the house to prevent accidental contact. The fumes released during the self-clean cycle, while generally harmless in well-ventilated kitchens, could potentially irritate sensitive respiratory systems in both children and animals. Prioritize their well-being by keeping them safely separated.

Cleaning the Oven Door
Avoid harsh detergents and abrasive cleaners when cleaning the oven door; instead, opt for gentle cleaning techniques to preserve the glass surface’s integrity.
Avoiding Harsh Detergents
When cleaning your GE oven door, especially after utilizing the self-clean cycle, it’s crucial to avoid harsh detergents and abrasive cleaning products. These can cause permanent damage to the glass surface, leading to scratching, discoloration, or even weakening of the door’s structure.
Instead, prioritize mild cleaning solutions like warm water mixed with a small amount of dish soap. This combination effectively removes ash residue and light stains without posing a risk to the door’s finish. Corrosive detergents are particularly detrimental, as they can etch the glass and compromise its protective coating. Remember, gentle is key when maintaining the pristine condition of your oven door, ensuring both its aesthetic appeal and functional longevity.
Gentle Cleaning Techniques
Following a self-clean cycle, or for routine cleaning, employ gentle cleaning techniques to preserve your GE oven door’s integrity. Begin with a soft, damp cloth to wipe away loose ash residue. For stubborn spots, create a paste of baking soda and water, applying it gently with a non-abrasive sponge.
Avoid rough or friction-inducing materials like steel wool or scouring pads, as these will scratch the glass. Circular motions are preferable to vigorous scrubbing. Rinse thoroughly with clean water and dry with a microfiber cloth to prevent streaks. Patience and a delicate touch are essential for maintaining a sparkling, undamaged oven door, ensuring optimal visibility and a polished appearance.

Maintaining Your GE Oven After Self-Cleaning
Regular wipe-downs after each use, coupled with proactive spill prevention, will minimize future cleaning needs and maintain your GE oven’s performance.
Regular Wipe-Downs
Consistent, quick cleanings are vital for preserving your GE oven’s condition post-self-clean. After the oven has fully cooled, a simple wipe-down of the interior surfaces prevents the build-up of grease and food particles. Utilize a damp cloth, potentially with a mild detergent, to address any lingering residue.
Avoid abrasive cleaners or scouring pads, as these can damage the oven’s enamel coating. Pay particular attention to areas prone to splatters, such as the bottom and sides. Regular wipe-downs, even after the self-clean cycle, significantly reduce the frequency with which a full self-clean is required, extending the oven’s lifespan and maintaining optimal cooking performance. This proactive approach ensures a consistently clean and efficient cooking environment.
Preventative Measures to Reduce Spills
Minimizing spills during cooking is crucial for lessening the burden on your GE oven’s self-cleaning function. Employ oven-safe cookware that adequately contains liquids and sauces. Consider using oven liners or baking sheets to catch drips and overflows, particularly when roasting or baking dishes prone to bubbling.

Carefully monitor food while cooking, adjusting temperatures as needed to prevent boil-overs. Avoid overfilling dishes, leaving sufficient space to accommodate expansion during the cooking process. Proactive spill prevention not only keeps your oven cleaner but also reduces smoke emission during self-clean cycles, contributing to a safer and more efficient appliance experience.